Friday, May 24, 2013


We are working on finishing up our biography projects in the 3rd grade.  Here are some examples of the Lapbooks my 3rd graders are creating.  I will post more examples next week.  They have been working really hard. I am impressed with what they have done with these projects.


Example of Rough Draft Timeline


Accordion Fold Timeline


Biography Lapbook Cover


Inside Layout

Inside the Lapbook students included:
1.Accordion Timeline
2.  Vocabulary from their biography
3. Bio Poem
4.  Interesting Facts Wheel
5.  Significance of Achievements Paragraph
6.  Quotes


This Student still needs to include quotes from Rosa Parks in the bottom right hand corner.


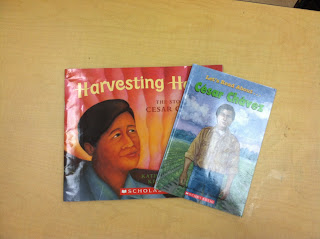
 These are some of the biographies that the students in my class selected from.  I wanted to give them a variety of choices that they were interested and were written at an appropriate level.


Thursday, May 23, 2013

Biography Lapbook Resources

These are some of the foldables I included inside the biography lapbooks that my third graders are working on.


Foldables-

This is the resource I used for the accordian fold booklet I used to make the timelines.  You can find the directions for the accordian foldable on page 32.


This where I found the template for the wheel that the kids used to record 6 interesting facts about their person.


Thursday, May 16, 2013

Biography Lapbooks

I am always browsing around looking for new ideas to use in my classroom.  One of the things I have come across, mostly on homeschooling sites are Lapbooks.  I like the idea of kids working on a concept over a period of time and  compiling them in a Lapbook.  I decided to use the idea with genre study on biographies.  I found some templates for different types of foldables to incorporate into the project.
 I started out by reading my 3rd graders the picture book biography of Amelia Earheart by David Adler.  I created a timeline using chart paper and modeled using a think aloud as I read  how to pull out important events in Amelia's life out of the text. ( the I do part of the lesson),  After that, we worked together to decide what else should be included on our timelines. I marked various stopping points in the text and had them discuss with their "turn and talk" partners about the key events from each section.  I circulated throughout the groups as they discussed and jotted down ideas they shared. After a brief discussion, we came back together and decided which events were the most important and recorded them on the class timeline. We looked at the structure of the biographies and talked about how the story was organized in chronological order.

 For the independent practice portion, I let the kids choose their own biography to read for their Lapbook  project.  I have a book bin that contains about 50 different biographies (The Goodwill Bookstore is the best place ever) that range in complexity in order to differentiate for the varying ability levels of my students. I tried to include a variety of books that would interest my students.  I really like the Who was....series of biographies as well as the picture book biographies written by David Adler.  As they were reading,  they recorded key dates in their person's life using a timeline graphic organizer. I reviewed the timelines individually with each student.  They had to have their timeline approved prior to beginning their final draft.  We took the information from and created pop out timelines for their Lapbooks using an Accordian foldable.  On each panel they included the key dates and events from their person's life and illustrated each one.  I am very pleased how they turned out.

Under the timeline they glued a book pocket.  They had to find keywords/vocabulary related to their books.  They wrote each vocabulary word on the front and a definition of the word on the back.  On the center panel, they are including Bio Poems about their person that they chose to read about.  We also included a "wheel" of interesting facts about their person.    We aren't quite done yet, but they will include a section on important achievements and their significance, and quotes.  I will post the links for the foldable templates and some examples of their finished products.  The kids in my class are really loving this project.  I will also post the rubric I designed to assess their final projects.  I am loving it because the kids have taught me about some really fascinating people.

Thursday, May 9, 2013

Animoto Book Trailer Resources

Based on what I have seen from other teachers, I decided it was a good idea to have the students design a rough draft storyboard prior to beginning the Animoto project.  I really emphasized that word choice is critical when using Animoto because text is limited.   We talked about how a few carefully chosen words or phrases can be powerful especially when combined with images, animation themes, pacing and music that fits the mood of their book. 
 In addition to showing them how to use Animoto to include text, we worked on adding Powerpoint to our presentations.  Students can create a slide and save it as a JPEG image.  After the slides are saved as JPEGs they can be uploaded to Animoto as an image.  I was impressed with myself when I figured that one out :).  We learned a lot of valuable lessons while playing with Powerpoint.  Many of the fonts end up blurry and hard to read when added into Animoto.
Doing this project was also an opportunity to teach my students about the importance of citing sources and copyright.  We are still working on it. :)

This is the storyboard I used with my students. Simple and to the point.

http://booktrailersforall.com/storyboard%20for%20use%20with%20students.pdf

These Websites offer some great resources for designing an Animoto book projects.

ANIMOTO RESOURCES:

http://maconeastlibraryprojects.wikispaces.com/Lesson+Plan+Animoto+Book+Trailers


http://highlandlc.wikispaces.com/Animoto+Book+Trailer+Unit

This website has both student and teacher copies of handouts.  The teacher copy is nice because it offers detailed explanations of what students need to include in each section of the presentation.


https://sites.google.com/site/booktrailersproject/home/rubric

This site has some great ressources, including tutorials that might help you and your students become more comfortable with Animoto.  It even has a rubric to look at to give you a starting point in terms of how you plan on assessing student projects.  In my class this was a project grade and was weighted the same as a exam grade.  For me it was an extremely effective way to assess my students understanding of story elements and plot.